Istio + SPIRE Integration - Complete Setup Guide# This guide provides step-by-step instructions to integrate Istio with SPIRE for workload identity management.
Prerequisites# Kubernetes cluster (tested on EKS) kubectl configured with cluster accesshelm 3.x installedistioctl installedCluster context name (e.g., foo-eks-cluster) Step 1: Install SPIRE# 1.1 Add SPIRE Helm Repository# 1
2
helm repo add spiffe https://spiffe.github.io/helm-charts-hardened/
helm repo update
1.2 Install SPIRE CRDs# 1
2
3
helm install spire-crds spiffe/spire-crds \
\
1.3 Install SPIRE Server and Agent# Create a values file for your cluster. For example, spire-values-foo-cluster.yaml:
1
2
3
4
5
6
7
8
9
10
11
12
global :
spire :
clusterName : foo-eks-cluster
trustDomain : foo.com
spire-server :
controllerManager :
watchClassless : true
caTTL : 720h
spiffe-oidc-discovery-provider :
enabled : false
Install SPIRE using the values file:
1
2
3
helm install spire spiffe/spire \
\
Important:
trustDomain must match Istio’s trust domain exactlyclusterName must be your actual cluster name (not “example-cluster”)watchClassless: true allows ClusterSPIFFEID resources without explicit className fieldOIDC discovery provider is disabled as it’s not needed for basic Istio integration 1.4 Verify SPIRE Installation# 1
kubectl get pods -n spire-server
Expected output:
1
2
3
4
NAME READY STATUS RESTARTS AGE
spire-agent-xxxxx 1/1 Running 0 1m
spire-server-0 2/2 Running 0 1m
spire-spiffe-csi-driver-xxxxx 2/2 Running 0 1m
Wait for all pods to be ready:
1
2
kubectl rollout status statefulset spire-server -n spire-server --timeout= 120s
kubectl rollout status daemonset spire-agent -n spire-server --timeout= 120s
Step 2: Create SPIRE Registration Entries# 2.1 Create ClusterSPIFFEID for Istio Ingress Gateway# 1
2
3
4
5
6
7
8
9
10
11
kubectl apply -f - <<EOF
apiVersion: spire.spiffe.io/v1alpha1
kind: ClusterSPIFFEID
metadata:
name: istio-ingressgateway-reg
spec:
spiffeIDTemplate: "spiffe://{{ .TrustDomain }}/ns/{{ .PodMeta.Namespace }}/sa/{{ .PodSpec.ServiceAccountName }}"
workloadSelectorTemplates:
- "k8s:ns:istio-system"
- "k8s:sa:istio-ingressgateway-service-account"
EOF
Note: The className field is optional when watchClassless: true is set in the controller manager configuration.
2.2 Create ClusterSPIFFEID for Application Workloads# 1
2
3
4
5
6
7
8
9
10
11
12
13
14
kubectl apply -f - <<EOF
apiVersion: spire.spiffe.io/v1alpha1
kind: ClusterSPIFFEID
metadata:
name: default
spec:
spiffeIDTemplate: "spiffe://{{ .TrustDomain }}/ns/{{ .PodMeta.Namespace }}/sa/{{ .PodSpec.ServiceAccountName }}"
podSelector:
matchLabels:
spiffe.io/spire-managed-identity: "true"
workloadSelectorTemplates:
- "k8s:ns:{{ .PodMeta.Namespace }}"
- "k8s:sa:{{ .PodSpec.ServiceAccountName }}"
EOF
2.3 Verify ClusterSPIFFEID Resources# 1
kubectl get clusterspiffeid
Expected output:
1
2
3
NAME AGE
default 10s
istio-ingressgateway-reg 20s
Step 3: Install Istio with SPIRE Integration# 3.1 Create Istio Configuration File# Create a file named istio-spire-config.yaml with the following content (replace foo.com and foo-eks-cluster with your values):
 1
 2
 3
 4
 5
 6
 7
 8
 9
10
11
12
13
14
15
16
17
18
19
20
21
22
23
24
25
26
27
28
29
30
31
32
33
34
35
36
37
38
39
40
41
42
43
44
45
46
47
48
49
50
51
52
53
54
55
56
57
apiVersion : install.istio.io/v1alpha1
kind : IstioOperator
metadata :
namespace : istio-system
spec :
profile : default
meshConfig :
trustDomain : foo.com
values :
global :
meshID : mesh1
multiCluster :
clusterName : foo-eks-cluster
network : foo-network
sidecarInjectorWebhook :
templates :
spire : |
labels:
spiffe.io/spire-managed-identity: "true"
spec:
containers:
- name: istio-proxy
volumeMounts:
- name: workload-socket
mountPath: /run/secrets/workload-spiffe-uds
readOnly: true
volumes:
- name: workload-socket
csi:
driver: "csi.spiffe.io"
readOnly: true
components :
ingressGateways :
- name : istio-ingressgateway
enabled : true
label :
istio : ingressgateway
k8s :
overlays :
# This is used to customize the ingress gateway template.
# It adds the CSI driver mounts, as well as an init container
# to stall gateway startup until the CSI driver mounts the socket.
- apiVersion : apps/v1
kind : Deployment
name : istio-ingressgateway
patches :
- path : spec.template.spec.volumes.[name:workload-socket]
value :
name : workload-socket
csi :
driver : "csi.spiffe.io"
readOnly : true
- path : spec.template.spec.containers.[name:istio-proxy].volumeMounts.[name:workload-socket]
value :
name : workload-socket
mountPath : "/run/secrets/workload-spiffe-uds"
readOnly : true
3.2 Create Istio Namespace# 1
kubectl create namespace istio-system
3.3 Install Istio# 1
istioctl install -y -f istio-spire-config.yaml
3.4 Verify Istio Installation# 1
kubectl get pods -n istio-system
Expected output:
1
2
3
NAME READY STATUS RESTARTS AGE
istio-ingressgateway-xxxxxxxxxx-xxxxx 1/1 Running 0 1m
istiod-xxxxxxxxxx-xxxxx 1/1 Running 0 1m
Wait for deployments to be ready:
1
2
kubectl rollout status deployment istiod -n istio-system --timeout= 120s
kubectl rollout status deployment istio-ingressgateway -n istio-system --timeout= 120s
3.5 Enable Istio Injection for Default Namespace# 1
kubectl label namespace default istio-injection= enabled
Apply a PeerAuthentication policy to enforce strict mTLS for all workloads in the default namespace:
1
2
3
4
5
6
7
8
9
10
kubectl apply -f - <<EOF
apiVersion: security.istio.io/v1
kind: PeerAuthentication
metadata:
name: "default"
namespace: "default"
spec:
mtls:
mode: STRICT
EOF
What this does:
Enforces mutual TLS for all service-to-service communication in the default namespace Rejects any plaintext traffic between services Ensures all workloads must present valid SPIRE-issued certificates Note: You can also apply this policy at the mesh level by creating it in the istio-system namespace without a namespace-specific selector.
Step 4: Deploy Test Workloads# 4.1 Deploy Sleep and Httpbin Applications# 1
2
3
4
5
6
7
8
9
10
11
12
13
14
15
16
17
18
19
20
21
22
23
24
25
26
27
28
29
30
31
32
33
34
35
36
37
38
39
40
41
42
43
44
45
46
47
48
49
50
51
52
53
54
55
56
57
58
59
60
61
62
63
64
65
66
67
68
69
70
71
72
73
74
75
76
77
78
79
80
81
82
83
kubectl apply -f - <<EOF
apiVersion: v1
kind: ServiceAccount
metadata:
name: sleep
namespace: default
---
apiVersion: v1
kind: Service
metadata:
name: sleep
namespace: default
spec:
ports:
- port: 80
name: http
selector:
app: sleep
---
apiVersion: apps/v1
kind: Deployment
metadata:
name: sleep
namespace: default
spec:
replicas: 1
selector:
matchLabels:
app: sleep
template:
metadata:
labels:
app: sleep
spiffe.io/spire-managed-identity: "true"
spec:
serviceAccountName: sleep
containers:
- name: sleep
image: curlimages/curl
command: ["/bin/sleep", "infinity"]
---
apiVersion: v1
kind: ServiceAccount
metadata:
name: httpbin
namespace: default
---
apiVersion: v1
kind: Service
metadata:
name: httpbin
namespace: default
spec:
ports:
- name: http
port: 8000
targetPort: 8080
selector:
app: httpbin
---
apiVersion: apps/v1
kind: Deployment
metadata:
name: httpbin
namespace: default
spec:
replicas: 1
selector:
matchLabels:
app: httpbin
template:
metadata:
labels:
app: httpbin
spiffe.io/spire-managed-identity: "true"
spec:
serviceAccountName: httpbin
containers:
- image: mccutchen/go-httpbin
name: httpbin
ports:
- containerPort: 8080
EOF
Critical: All workloads must have the label spiffe.io/spire-managed-identity: "true" to receive SPIRE certificates.
4.2 Wait for Pods to be Ready# 1
2
kubectl wait --for= condition = ready pod -n default -l app = sleep --timeout= 60s
kubectl wait --for= condition = ready pod -n default -l app = httpbin --timeout= 60s
Step 5: Verify SPIRE Integration# 5.1 Check Sleep Pod Certificate# 1
2
3
4
5
6
POD = $( kubectl get pod -n default -l app = sleep -o jsonpath = '{.items[0].metadata.name}' )
istioctl proxy-config secret $POD .default -o json | \
'.dynamicActiveSecrets[0].secret.tlsCertificate.certificateChain.inlineBytes' | \
| \
| \
"(Issuer:|Subject Alternative Name:)" -A1
Expected output:
1
2
3
4
5
Issuer: O=foo.com
Validity
--
X509v3 Subject Alternative Name: critical
URI:spiffe://foo.com/ns/default/sa/sleep
5.2 Check Httpbin Pod Certificate# 1
2
3
4
5
6
POD = $( kubectl get pod -n default -l app = httpbin -o jsonpath = '{.items[0].metadata.name}' )
istioctl proxy-config secret $POD .default -o json | \
'.dynamicActiveSecrets[0].secret.tlsCertificate.certificateChain.inlineBytes' | \
| \
| \
"URI:spiffe"
Expected output:
1
URI:spiffe://foo.com/ns/default/sa/httpbin
5.3 Verify Ingress Gateway Certificate# 1
2
3
4
5
6
POD = $( kubectl get pod -n istio-system -l app = istio-ingressgateway -o jsonpath = '{.items[0].metadata.name}' )
istioctl proxy-config secret $POD .istio-system -o json | \
'.dynamicActiveSecrets[0].secret.tlsCertificate.certificateChain.inlineBytes' | \
| \
| \
"URI:spiffe"
Expected output:
1
URI:spiffe://foo.com/ns/istio-system/sa/istio-ingressgateway-service-account
5.4 Test mTLS Communication# Important: In Istio service mesh, mTLS happens transparently between the Envoy proxies (sidecars). The application containers communicate using plain HTTP, but the Istio proxies automatically upgrade the connection to mTLS.
Test communication between workloads:
1
2
POD = $( kubectl get pod -n default -l app = sleep -o jsonpath = '{.items[0].metadata.name}' )
kubectl exec -n default $POD -c sleep -- curl -s http://httpbin:8000/headers
What’s happening:
Sleep container sends plain HTTP request to http://httpbin:8000 Sleep’s Istio sidecar intercepts the request Sleep’s sidecar establishes mTLS connection to httpbin’s sidecar using SPIRE certificates Httpbin’s sidecar receives the mTLS connection and forwards plain HTTP to httpbin container Httpbin’s sidecar adds the X-Forwarded-Client-Cert header with the client certificate info
Look for the X-Forwarded-Client-Cert header in the response. This header proves that mTLS is working - it contains the client certificate information that was used in the mTLS connection between the sidecars.
Example output showing mTLS is working:
1
2
3
4
5
6
{
"headers" : {
"X-Forwarded-Client-Cert" : "By=spiffe://foo.com/ns/default/sa/httpbin;Hash=..." ,
...
}
}
5.5 Test Multiple Requests# 1
2
3
4
POD = $( kubectl get pod -n default -l app = sleep -o jsonpath = '{.items[0].metadata.name}' )
for i in { 1..10} ; do
kubectl exec -n default $POD -c sleep -- curl -s -o /dev/null -w "%{http_code}\n" http://httpbin:8000/get
done | sort | uniq -c
Expected output (all 200 OK):
Step 6: Verify SPIRE Registration Entries# 6.1 Check Registration Entries in SPIRE Server# 1
2
3
kubectl exec -n spire-server spire-server-0 -c spire-server -- \
\
You should see entries for:
spiffe://foo.com/ns/default/sa/sleepspiffe://foo.com/ns/default/sa/httpbinspiffe://foo.com/ns/istio-system/sa/istio-ingressgateway-service-account6.2 Check ClusterSPIFFEID Status# 1
kubectl get clusterspiffeid default -o yaml
Look for the status section showing the number of pods selected and entries created.
Step 7: Setup Observability (Optional)# 7.1 Install Prometheus# Install Prometheus to collect metrics from Istio and workloads:
1
kubectl apply -f https://raw.githubusercontent.com/istio/istio/release-1.24/samples/addons/prometheus.yaml
Wait for Prometheus to be ready:
1
kubectl wait --for= condition = available deployment/prometheus -n istio-system --timeout= 120s
7.2 Install Kiali# Install Kiali for service mesh visualization:
1
kubectl apply -f https://raw.githubusercontent.com/istio/istio/release-1.24/samples/addons/kiali.yaml
Wait for Kiali to be ready:
1
kubectl wait --for= condition = available deployment/kiali -n istio-system --timeout= 120s
7.3 Access Kiali Dashboard# Port-forward to access Kiali:
1
kubectl port-forward svc/kiali -n istio-system 20001:20001
Open your browser to: http://localhost:20001
7.4 Generate Traffic for Visualization# Generate continuous traffic to see it in Kiali:
1
2
3
POD = $( kubectl get pod -n default -l app = sleep -o jsonpath = '{.items[0].metadata.name}' )
kubectl exec -n default $POD -c sleep -- sh -c \
"while true; do curl -s http://httpbin:8000/headers > /dev/null; sleep 2; done" &
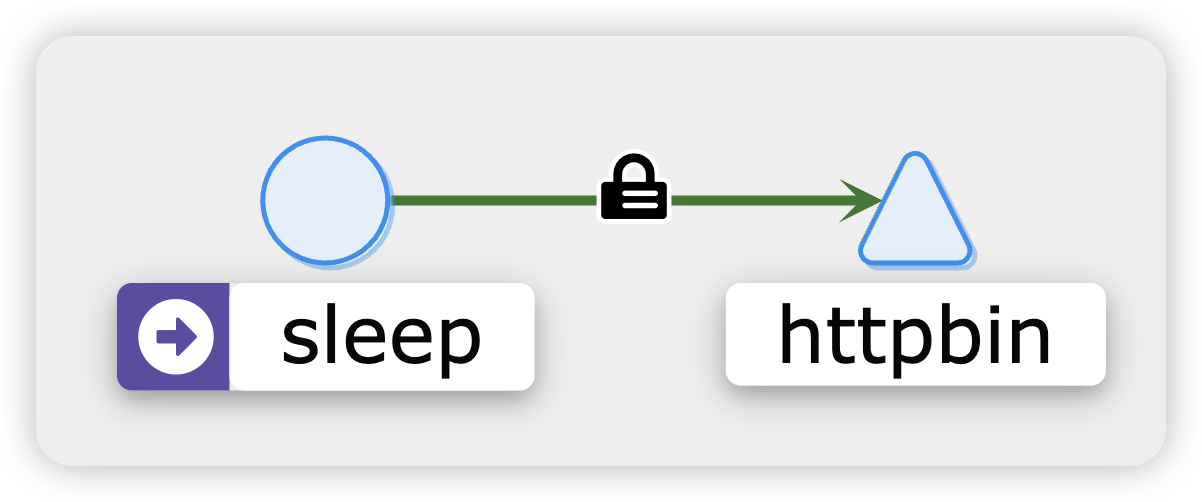
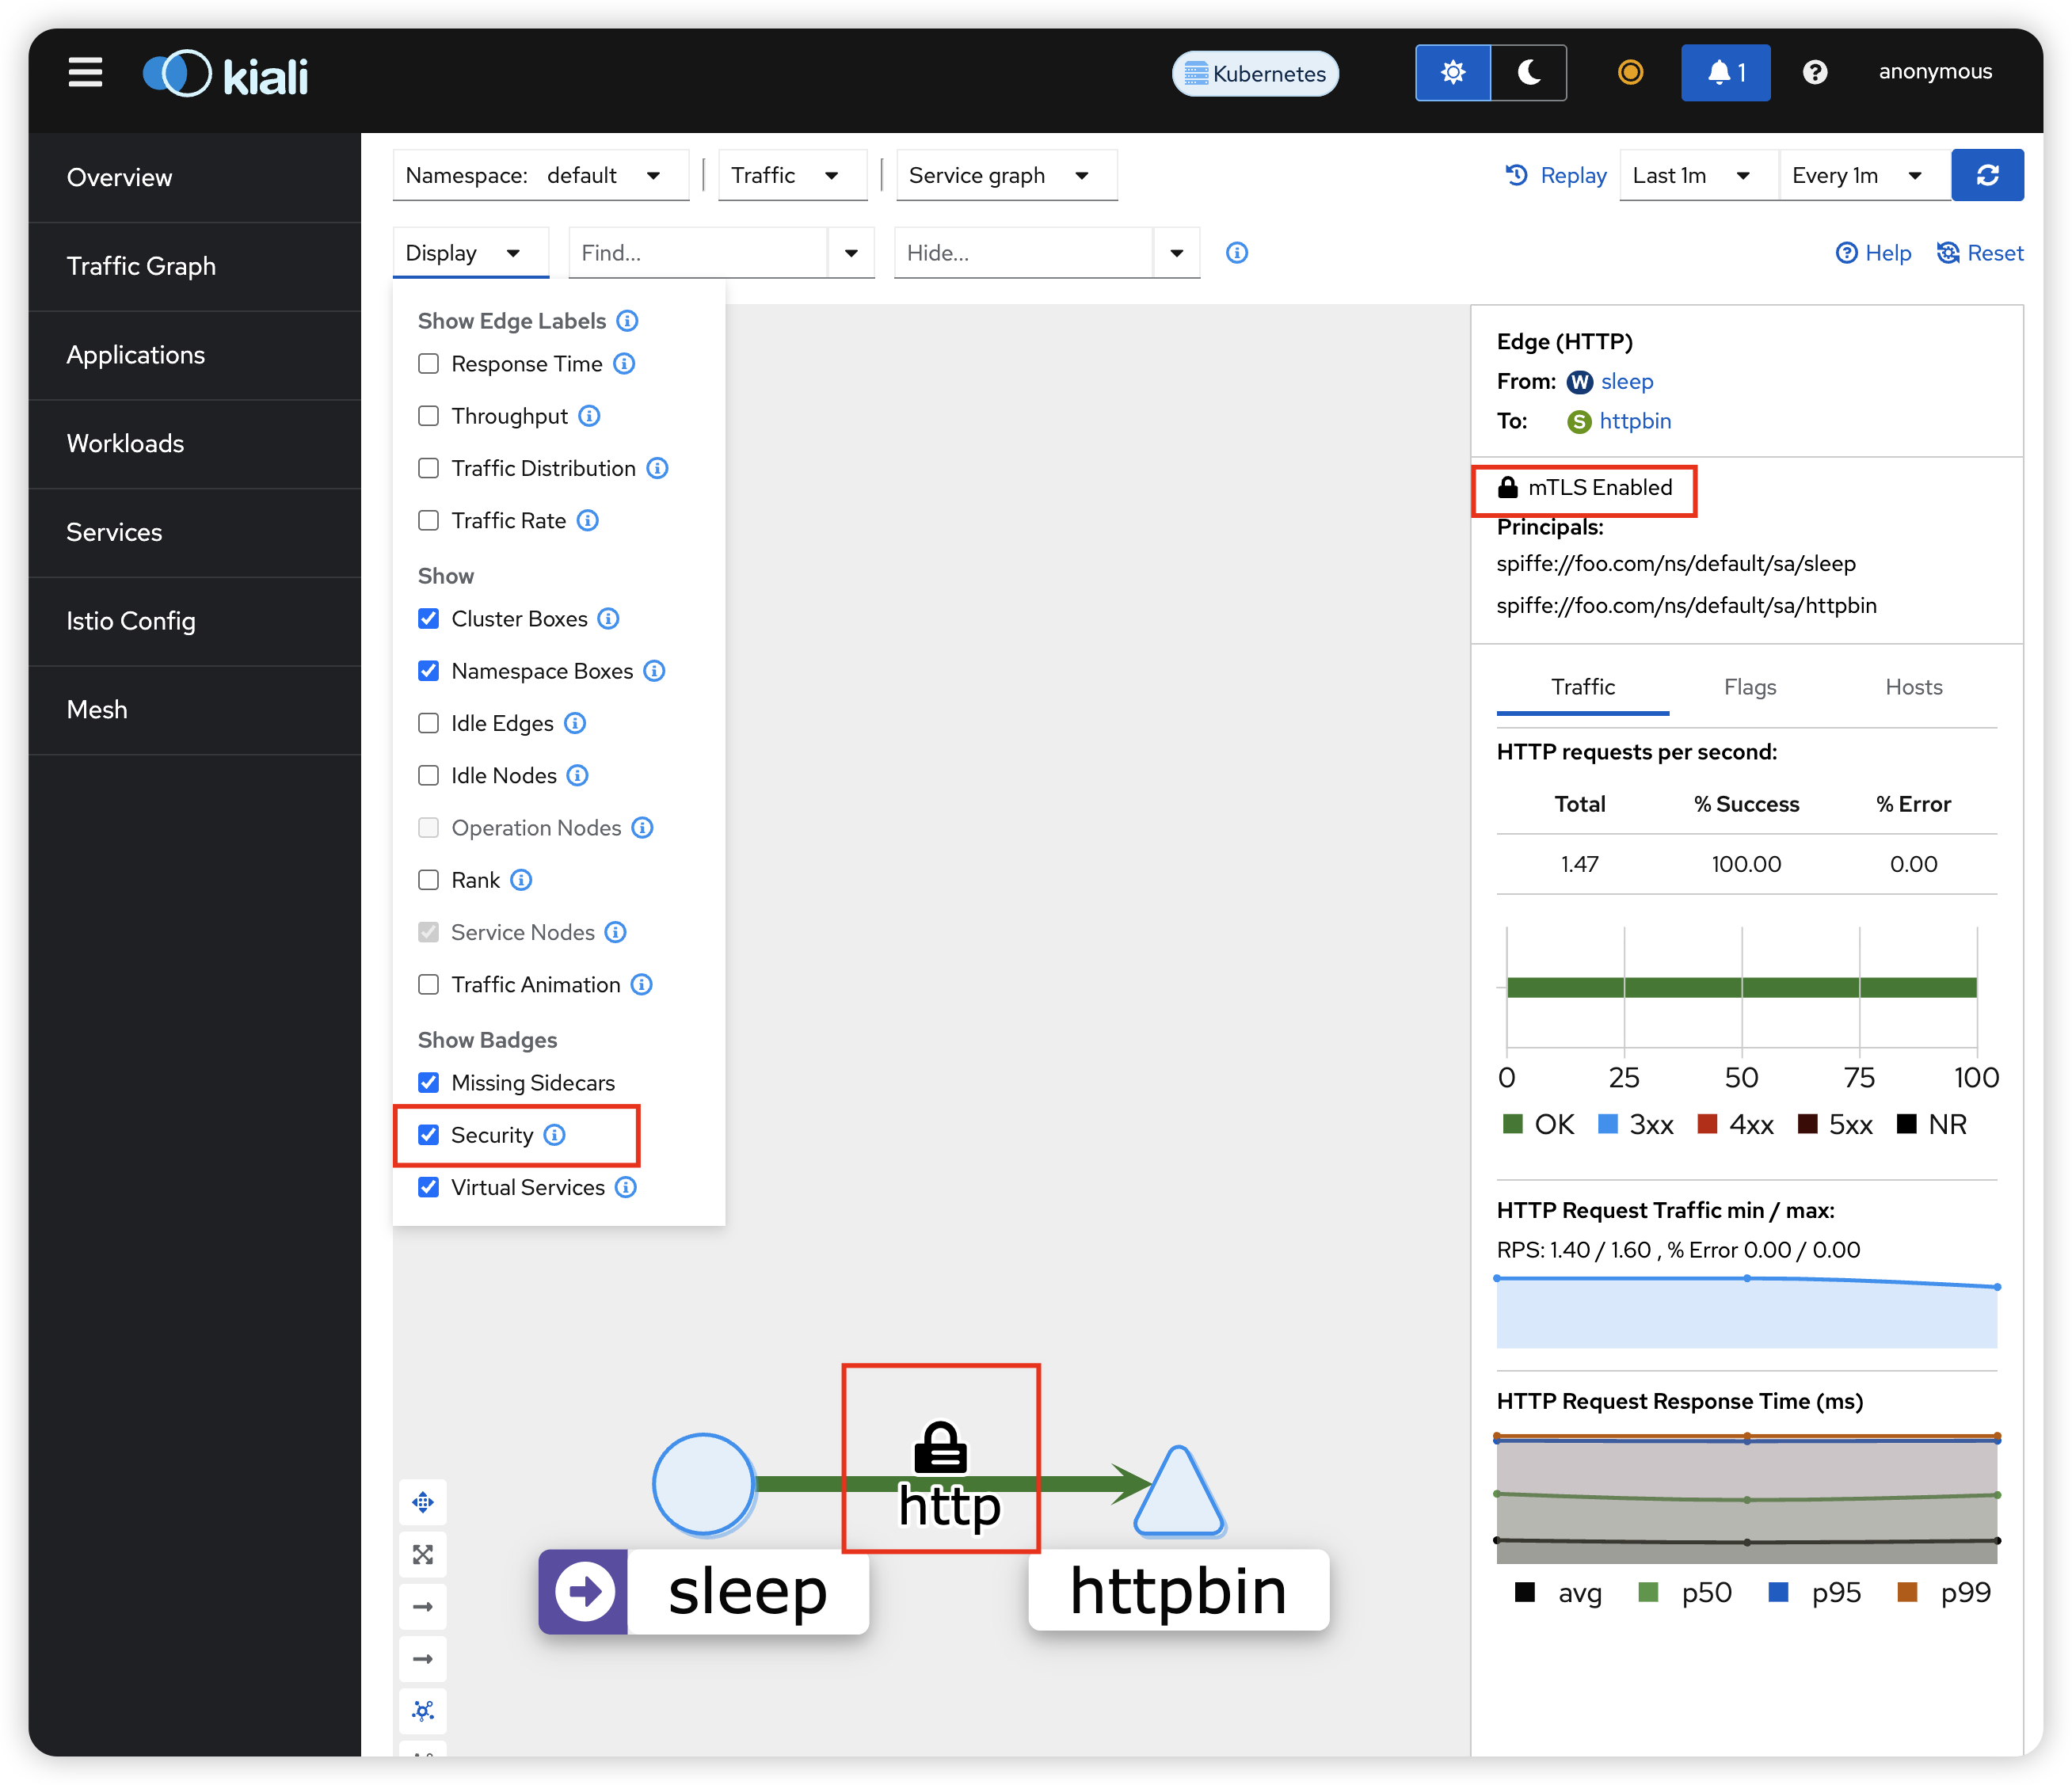
7.5 Visualize mTLS and SPIRE Identities in Kiali# Visualize mTLS and SPIRE Identities in Kiali
In the Kiali dashboard:
Graph View :
Go to Graph tab Select namespace: default Display: Enable “Security” badges You’ll see lock icons (🔒) indicating mTLS connections Traffic flows: sleep → httpbin Verify SPIRE Identities :
Click on the httpbin service node Go to the Workloads tab Click on the httpbin workload In the Logs tab, select the istio-proxy container Search for “SPIFFE” to see SPIRE identity logs Check mTLS Status :
In the Graph view, the lock icons confirm mTLS is active Click on the edge between sleep and httpbin The side panel shows connection details including mTLS status View Certificates :
Go to Workloads → select httpbin Click Envoy tab Navigate to Secrets section You’ll see the SPIRE-issued certificates with SPIFFE IDs 7.6 Stop Traffic Generation# To stop the background traffic:
1
pkill -f "curl.*httpbin"
7.7 Install Grafana (Optional)# For advanced metrics visualization:
1
2
kubectl apply -f https://raw.githubusercontent.com/istio/istio/release-1.24/samples/addons/grafana.yaml
kubectl wait --for= condition = available deployment/grafana -n istio-system --timeout= 120s
Access Grafana:
1
kubectl port-forward svc/grafana -n istio-system 3000:3000
Open: http://localhost:3000
Pre-configured Istio dashboards are available showing:
Mesh metrics Service performance Workload metrics Control plane metrics Troubleshooting# Issue: Pods Not Getting SPIRE Certificates# Symptoms: Workload pods show “default” identity errors in logs
Solutions:
Verify the workload has the required label: 1
kubectl get pod <pod-name> -o jsonpath = '{.metadata.labels}' | grep spire-managed-identity
Check SPIRE agent logs: 1
kubectl logs -n spire-server daemonset/spire-agent --tail= 50
Verify ClusterSPIFFEID exists and matches: 1
2
kubectl get clusterspiffeid
kubectl describe clusterspiffeid default
Issue: Trust Domain Mismatch# Symptoms: Certificate verification errors, authentication failures
Solutions:
Verify SPIRE trust domain: 1
kubectl get configmap -n spire-server spire-server -o jsonpath = '{.data.server\.conf}' | grep trust_domain
Verify Istio trust domain: 1
kubectl get configmap istio -n istio-system -o jsonpath = '{.data.mesh}' | grep trustDomain
Both must match exactly. If they don’t, reinstall with matching trust domains. Issue: Ingress Gateway Not Starting# Symptoms: Gateway pod stuck in CrashLoopBackOff or not ready
Solutions:
Check if ClusterSPIFFEID exists for ingress gateway: 1
kubectl get clusterspiffeid istio-ingressgateway-reg
Verify CSI volume is mounted: 1
kubectl get pod -n istio-system -l app = istio-ingressgateway -o yaml | grep -A10 "workload-socket"
Check gateway logs: 1
kubectl logs -n istio-system -l app = istio-ingressgateway -c istio-proxy --tail= 100
Issue: Wrong Cluster Name in SPIRE# Symptoms: Node attestation failures, agents not connecting
Solutions:
Check current cluster name in SPIRE config: 1
kubectl get configmap -n spire-server spire-agent -o jsonpath = '{.data.agent\.conf}' | jq '.plugins.NodeAttestor[0].k8s_psat.plugin_data.cluster'
If it shows “example-cluster”, upgrade SPIRE with correct cluster name: 1
2
3
4
helm upgrade spire spiffe/spire -n spire-server \
= foo.com \
= foo-eks-cluster \
Restart SPIRE agents: 1
kubectl rollout restart daemonset spire-agent -n spire-server
Key Configuration Points# 1. Trust Domain Alignment# SPIRE global.spire.trustDomain MUST equal Istio meshConfig.trustDomain Mismatch causes authentication failures Both must use the same value (e.g., foo.com) 2. Cluster Name# SPIRE global.spire.clusterName must be the actual cluster name Default “example-cluster” causes attestation failures Use your real cluster name (e.g., foo-eks-cluster) 3. CSI Driver# SPIFFE CSI driver is automatically installed with SPIRE Helm chart Mounts SPIRE socket at /run/secrets/workload-spiffe-uds/socket Istio ingress gateway must be configured to use CSI volume (shown in Step 3.1) 4. Workload Labels# Workloads MUST have label: spiffe.io/spire-managed-identity: "true" This label is used by ClusterSPIFFEID selector Without this label, workloads won’t get SPIRE certificates Istio requires: spiffe://<trust-domain>/ns/<namespace>/sa/<service-account> ClusterSPIFFEID template must follow this exact pattern Template shown in Step 2.2 provides correct format 6. Service Account# Each workload must have a ServiceAccount SPIFFE ID includes the service account name Different service accounts get different SPIFFE IDs 7. Controller Manager Class Configuration# watchClassless: true allows ClusterSPIFFEID resources without className fieldWhen set to false, all ClusterSPIFFEID resources must explicitly specify className: spire-server-spire Recommended to use watchClassless: true for simpler configuration Multiple SPIRE installations in the same cluster should use different className values Verification Checklist# Use this checklist to verify your setup:
Clean Up# To remove the installation:
 1
 2
 3
 4
 5
 6
 7
 8
 9
10
11
12
13
14
15
16
# Delete workloads
kubectl delete deployment sleep httpbin -n default
kubectl delete svc sleep httpbin -n default
kubectl delete sa sleep httpbin -n default
# Delete ClusterSPIFFEID resources
kubectl delete clusterspiffeid default istio-ingressgateway-reg
# Uninstall Istio
istioctl uninstall --purge -y
kubectl delete namespace istio-system
# Uninstall SPIRE
helm uninstall spire -n spire-server
helm uninstall spire-crds -n spire-server
kubectl delete namespace spire-server
Multi-Cluster Setup# For setting up Istio + SPIRE across multiple clusters:
Create cluster-specific values files for each cluster: Cluster 1 (foo-eks-cluster) - spire-values-foo-cluster.yaml:
1
2
3
4
5
6
7
8
9
10
11
global :
spire :
clusterName : foo-eks-cluster
trustDomain : foo.com
spire-server :
controllerManager :
watchClassless : true
spiffe-oidc-discovery-provider :
enabled : false
Cluster 2 (bar-eks-cluster) - spire-values-bar-cluster.yaml:
1
2
3
4
5
6
7
8
9
10
11
global :
spire :
clusterName : bar-eks-cluster
trustDomain : bar.com
spire-server :
controllerManager :
watchClassless : true
spiffe-oidc-discovery-provider :
enabled : false
Install SPIRE on each cluster using its respective values file: 1
2
3
4
5
# On cluster 1
helm install spire spiffe/spire -n spire-server -f spire-values-foo-cluster.yaml

# On cluster 2
helm install spire spiffe/spire -n spire-server -f spire-values-bar-cluster.yaml
Each cluster operates independently with its own SPIRE server and trust domain
For cross-cluster communication, additional configuration is required:
Istio multi-cluster setup with remote secrets East-west gateways for cross-cluster traffic SPIRE federation for trust bundle exchange (advanced) Note: Cross-cluster mTLS with federated SPIRE trust domains requires additional Envoy configuration beyond the scope of this guide.
References#